Dying to Ombre

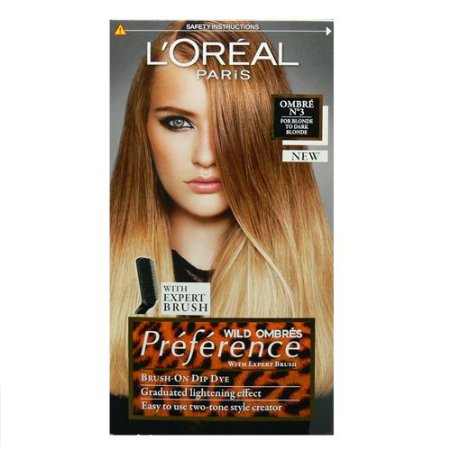
From the moment I laid eyes on this on the shelf of Wally World I have been DYING to try it. I haven”t come up with the courage yet, but I will. I have pretty much done every thing there is to do to your hair at home previously, so I have no idea why this scares me….but it does. Anyone tried it?? Anyone??


ombre

Denim and Diamonds: Centerpiece Options

We received a comment on our Facebook page recently asking about some inexpensive options for a  “Denim and Diamonds” themed party, and here’s what we came up with!

Hope this helps…keep us posted on what you end up using!

Christmas Stocking Update

Remember when I told y’all I was gonna make stockings this year? Well I did some semi-homemade ones…I had every intention of going and buying the felt to actually sew the stockings but when I got to my fabric store lo and behold they had basic red felt stockings that I could use as a base to start with.  So I bought 4 of those puppies and some rick rack and felt squares.  I had purchased two ornaments (an owl and a hedgehog) to put on the pockets of the boys’ stockings the week before.  So I got to work and ended up just hot glueing the majority of the project.  My plan for next year is to actually embroider their names on by hand (inspired by this), but for now I’m just going to use the initials.

The Great Necklace Exchange of 2011

Hey everyone! I’m going to be participating in The Great Necklace Exchange of 2011 over on the Fashion Loves People blog. Go read about it, it sounds super fun and it clearly states that you don’t have to be a designer or even creative…SOLD! I was a little hesitant at first but I’m just gonna go for it and see what I can come up with.  Who wants in? It’s the last day to sign up!!!

Pinterest: Crafts

Continuing on with my Pinterest series…today I’m featuring craft ideas I’ve found that I may or may not attempt.  I’m going to do a kid post tomorrow that will have a few craft ideas in it as well, so stayed tuned for that.

  1. felt numbers for weeks/months of baby’s first year
  2. friendship bracelets
  3. mod podge canvas
  4. personalized tees made with bleach
  5. a simple clutch
  6. photo letter

Craft ideas you’ve run across recently. Go.

Honestly WTF

Have you heard of this site? Honestly WTF is a site I stumbled upon recently and I’m LOVING their DIY tutorials, specifically on bracelets. The photo above are some of the ones that inspired me to get my craft on.

DIY Braided Hex Nut Bracelet
DIY Rope Bracelet
DIY Friendship Bracelet

Here is what I ended up with! They were pretty easy! The only ones that gave me a hard time were the rope bracelets, I could not wrap my head around how to tie that adjustable knot, but I finally got it right after several tries. The friendship bracelet, while it took a long time, it was pretty relaxing to sit and do while I watched Celebrity Rehab.  And you guessed it, I did not have rhinestones, but I did have turquoise beads (shocker).

[caption id="attachment_8604" align="alignnone" width="500" caption="Sorry for the crap, unprofessional, taken at night photos"][/caption]

The turquoise/green and shades of grey bracelets idea was found in the comments of Honestly WTF and you can find that tutorial here. I can’t wait to figure out how to mix and match these with other bracelets I have.  What DIY stuff have you been doing recently?

Hang Your Hat Up

I recently shared with you my unusual method of necklace storage, so I thought I would now share my ingenious method of hat storage. You see, I have a lot of hats. I have learned from experience that sunburnt scalps suck so if I spend any amount of time in the sun (which is all the time in spring and summer) I will have a hat on my head. While trying to figure out a way to cleverly store my hats without crushing them, I happened upon  some tie back hooks I had leftover from hanging curtains. There in lies my genius. You can just screw them into the wall and hang up your hat. They come in packages of 6 for about $1, and you can usually make more than one hat fit on each hook.  Like I said, ingenious.

I Have 2 Nice Racks…

And they hold my necklaces. Gotcha! Seriously though, using a tie rack as necklace storage might be the best idea I have ever had. Actually I stole it from my old roommate, so it wasn’t my idea at all. But it might be the best idea anyone has had. You can get a tie rack for around 5 bucks so there is no need to be wasting money on the expensive ones unless you are going for looks. (Obviously I was not if that picture is any indication). Just screw it into your closet wall and BAM! Cheap, easy storage.

Holiday Gift Guides: Experience Gifts

I’m a huge fan of giving the gift of a class or experience.  It’s probably not the first thing you think of but they are a huge hit and so fun.  Here’s some ideas:

  1. One year my mom got my dad a new fancy schmancy camera, so I got him a class on how to use that camera.  Give the gift of a photography class.
  2. My husband loves to cook, last year I had a local chef come to our house to teach him how to make a classic french meal.  Give a private or group cooking class!
  3. How bout skydiving!  If you are willing to do a tandem jump you don’t have to be there for some 8 hour class to learn how to jump on your own.
  4. Knitting/Crocheting/Sewing classes…last year I got a sewing machine and also got a “Get to Know your Sewing Machine” class.  It was awesome.  I’m hoping this year I’ll relearn crocheting.
  5. Guitar Lessons was a gift my dad gave my mom one year.
  6. Wine Tasting! Learn more about wine and get a little Tipsy at the same time!

Do you give these types of gifts? If so, what have you given? I’d love to hear!!

Photos courtesy of Amazon, noisiestpassenger.com, wineexpedition.com,

CrafTee Tutorial

I am a pretty regular participant in The Working Closet flickr pool and an avid reader of The Working Closet blog. The gist is that you post your everyday looks, so you can inspire others and gain inspirations for what to wear daily. I enjoy it and think its a great way to make you think about shopping your own closet.

Last week I posted a tee that I wore and happened to have made myself.

This is the tee that started it all:

orig

The wonderful Susan of The Working Closet  and Friday Playdate asked me kindly to create a tutorial of how I made my tees. They are a great way to make new of your old tiresome things and extend your wardrobe, thus saving money on shopping sprees.

Here is a step by step tutorial on a double ruffle neck tee:

supplies

Supplies: a tee (any neck will do), approximately 2 yards of ruffled or pleated ribbon or blanket/quilt binding, pins, and a needle and thread (you could definitely do this on a sewing machine as well)

step 1

Step 1:  Pin your ribbon right along the edge of the neck band on the tee. Pin all the way around the entire band.

step 2

Step 2:  Stitch along the top area of the ribbon

step 3

Step 3:  Continue your stitching under the neck band all the way around the tee, including the back. Then cut your ribbon off once you have made it all the way around.

step 4

Step 4:  Lay the next layer of ribbon right at the top of the neck band and pin all the way around.

step 5

Step 5:  Stitch this layer of ruffle the exact same way you did before, being a little more cautious since this layer will not be covered with another layer. Cut your ribbon off once you have made it all the way around.

admire 1

Step 6:  Step back and admire your work

admire 2

Here I am modeling the tee… it is so easy and such a cute way to update a plain tshirt in a very inexpensive way.

complete